Force directed graph: bounding box
In this example we’ll keep the force directed graph constrained inside a box. The nodes won’t be able to go outside.
The basic gist of it is that you impose a constraint that takes effect on every tick of the simulation. You can either put this code inside the tick function, or you can define a custom force to do the work for you.
Let’s go through both methods.
Method 1: use the tick function Link to heading
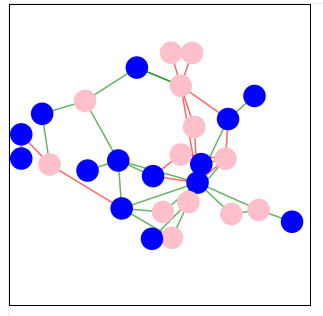
The first method is to put the constraints inside the tick function. Click above to see this method in action!
Here’s the relevant code.
function tickActions() {
    //constrains the nodes to be within a box
      node
        .attr("cx", function(d) { return d.x = Math.max(radius, Math.min(width - radius, d.x)); })
        .attr("cy", function(d) { return d.y = Math.max(radius, Math.min(height - radius, d.y)); });

    link
        .attr("x1", function(d) { return d.source.x; })
        .attr("y1", function(d) { return d.source.y; })
        .attr("x2", function(d) { return d.target.x; })
        .attr("y2", function(d) { return d.target.y; });
}
Method 2: use a custom force Link to heading

The other option is to define a custom force that applies on every tick. Like before, click on the above picture to see this method in action.
Look at the below code:
//custom force to put stuff in a box
function box_force() {
  for (var i = 0, n = nodes_data.length; i < n; ++i) {
    curr_node = nodes_data[i];
    curr_node.x = Math.max(radius, Math.min(width - radius, curr_node.x));
    curr_node.y = Math.max(radius, Math.min(height - radius, curr_node.y));
  }
}

simulation
    .force("charge_force", charge_force)
    .force("center_force", center_force)
    .force("links",link_force)
    .force("box_force", box_force)
 ;
We define the custom force box_force() that implements the constraint for us. In this custom force we loop through every node and update its x and y position to be constrained inside the box.
You then add the force to the simulation like you’d apply any other force.
We also need to ensure that we can’t drag the nodes out of the graph ourselves with the mouse. To fix this we can modify the drag function to impose the same constraint as the custom force:
//make sure you can't drag the circle outside the box
function drag_drag(d) {
  d.fx = Math.max(radius, Math.min(width - radius, d3.event.x));
  d.fy = Math.max(radius, Math.min(height - radius, d3.event.y));
}
Click here if you need a reminder of how drag and drop works in d3.
Differences Link to heading
There’s a few differences between the two methods.
One effect of doing it the second way is that the geometric constraint isn’t as rigidly enforced as in the first method. It’s more of a “soft” force, so you’ll get some overlap of the node at the borders.
This is why you’ve got the iterations parameter for the collideForce and the linkForce: to have the option to negate the soft force. We haven’t implemented the iterations parameter here in this custom function.
There’s also some differences in the behaviour of nodes near the borders.
Experiment with the two and see for yourself!
Hope you found that useful! Click here to view to the rest of the force directed graph series.